4/27/14: Keel, Ballast, Bilge
It was previously asserted that the ballast was laid up in six steps of concrete/lead ballast, stepping downward as one moves fore to aft. It turns out that there is a seventh step in the bilge. The diagram below shows the layout. The horizontal dashed line shows the level of the cabin sole. The vertical brown lines are bulkheads that separate the steps. Step 2 supports the two compression posts under the mast. The forward water tank sits over steps 3 and 4, and the aft tank sits over steps 5 and 6. The space over step 7 is the bilge.
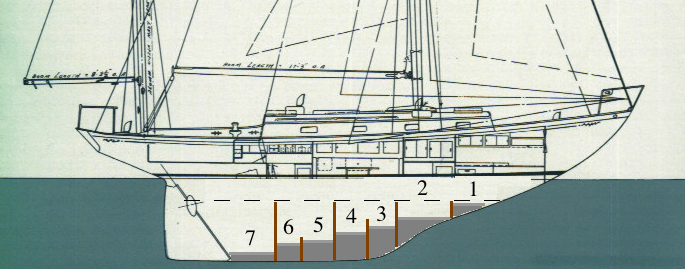
Seven steps of concrete (and lead) ballast.
The bulkhead between steps 1 and 2 was rotted and far gone. Notice from the diagram that this bulkhead is the only one that is nowhere sandwiched between steps.
The timbers that support the floor establish the level of the floor throughout the cabin. The photo shows a string clamped to the top of an aft timber.

Using strings to establish the level of the floor
Two such strings were used to establish the level of the floor while fabricating the small bulkhead that separates steps 1 and 2, as shown in the photo below. With the strings taut, and just touching the tops of the floor timbers, the strings define the level of the top of any floor timber.
The two strings establish the level of the top of the floor timbers.
The horizontal piece in the pattern just touches the strings.
The bulkhead pattern is complete and ready to be transcribed to plywood.
Here the bulkhead is set in a fillet of thickened epoxy.
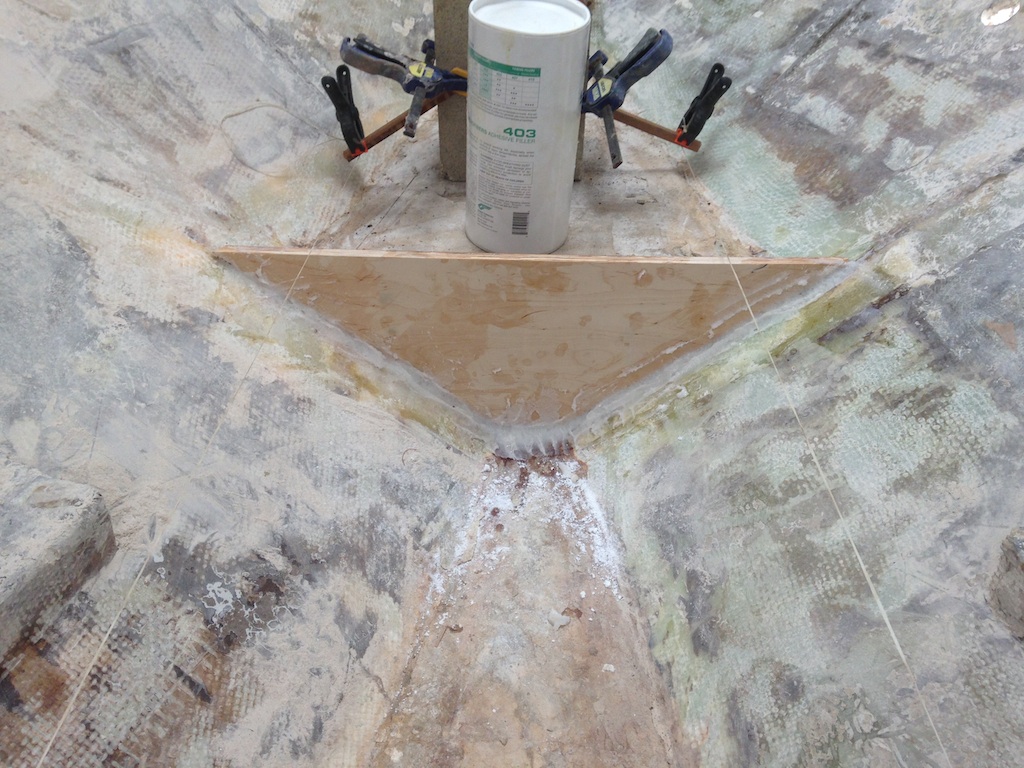
The bulkhead is set in thickened epoxy.
Each step must be inspected, repaired (if necessary), dried out (if necessary) and then sealed so that the concrete is completely protected from water. The top step is in good condition and is dry, so glass was laid up immediately following the installation of the bulkhead, as shown in the photo below. At least one more layer of glass will be applied. Once all seven steps are protected in this way, then water may be used freely for cleaning.
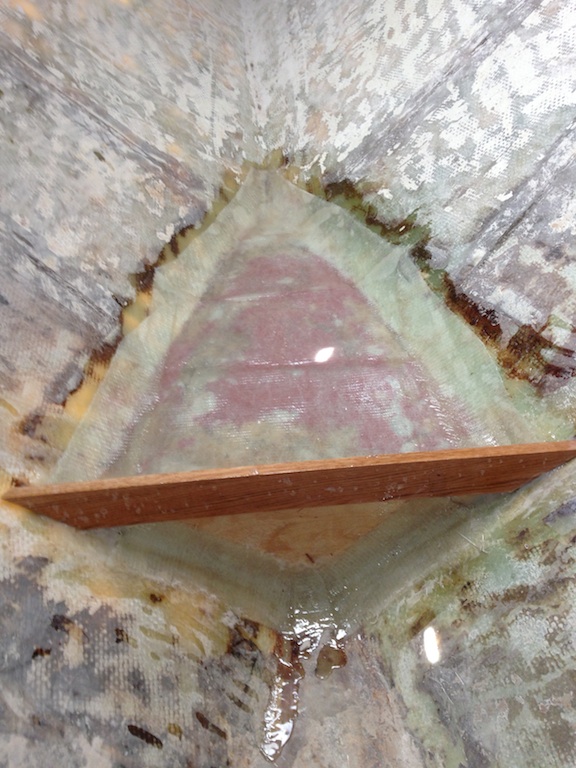
Step 1 with one coat of glass and epoxy.
Step 2 is in good condition, but steps 3, 4, 5, 6, and 7 need some work. The concrete has deteriorated in some places where there has been water penetration. The photo below, for example, shows the top of step 6, where you can see that the concrete has deteriorated to the point where it is brittle (some of it can be crumbled with a bare hand). Various tools were used to break up the damaged concrete, which was then removed using the shop vac. The damage to steps 3-6 was, fortunately, not too bad, and the “good” concrete seems to be in very good condition. Fresh concrete will be mixed and will replace the removed concrete.
The top of step 6, showing the deterioration of the concrete at the top.
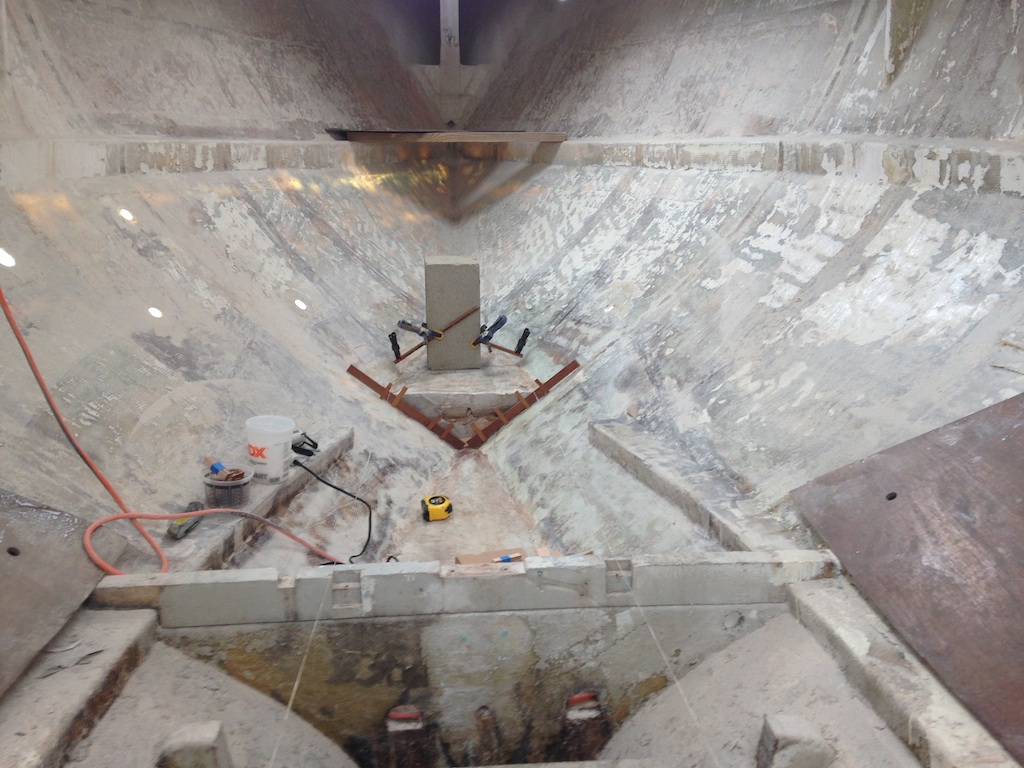
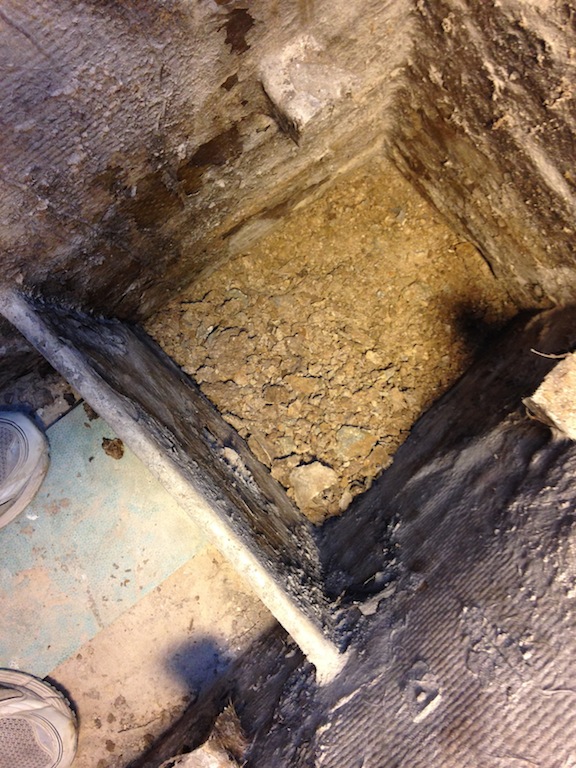
Here we are looking down on step 7, which is the bilge area. The concrete here suffered the most damage, which isn’t surprising at all.

Step 7
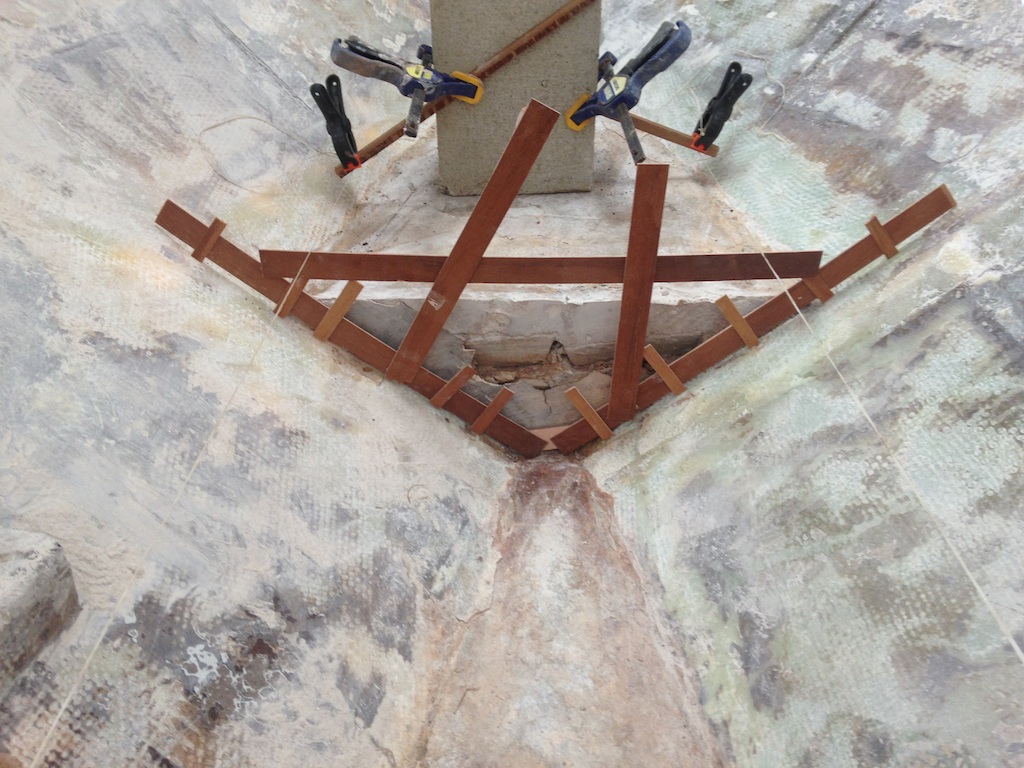
The large bulkhead that separates steps 6 and 7 would make it nearly impossible to repair the bilge properly, so it must be removed. It would be extremely difficult to remove this bulkhead in one piece (in which case it might be used as a pattern for its replacement), so a crude pattern was constructed, which might help when the new bulkhead is being made.
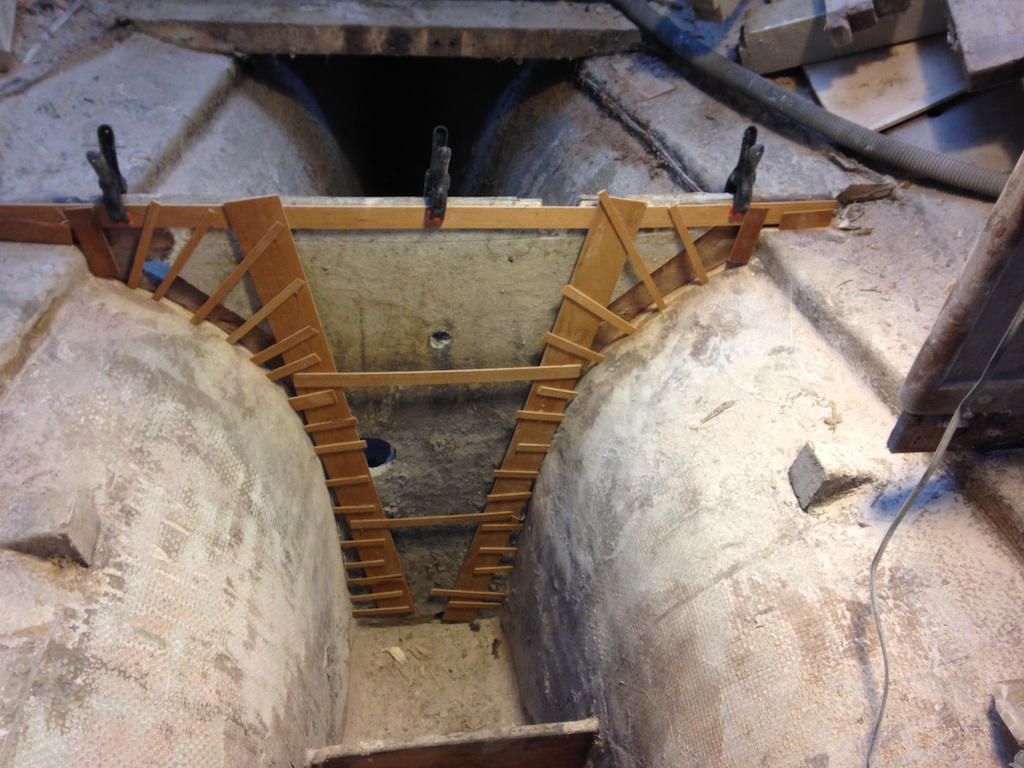
A crude pattern might help when this bulkhead is being replaced.
This bulkhead was tabbed in very heavily and glassed all over. It was extremely difficult to remove. Below you can see the very bottom of the bulkhead. The black colored areas are damp and smell like diesel fuel.
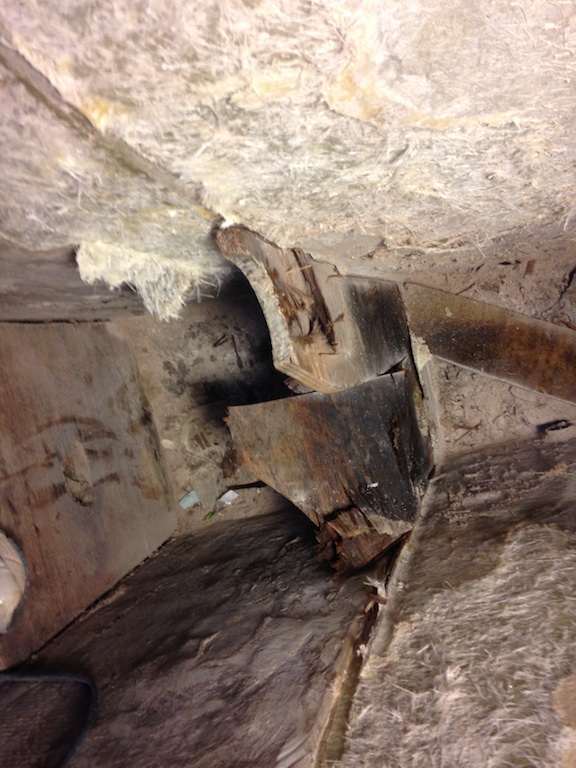
The bottom of the bulkhead shows signs of damage.
The next step was to remove the damaged concrete, which exposed the bottom of the bulkhead. The photo below shows a spade being used to shovel out the debris from step 7. This debris smelled like diesel fuel.
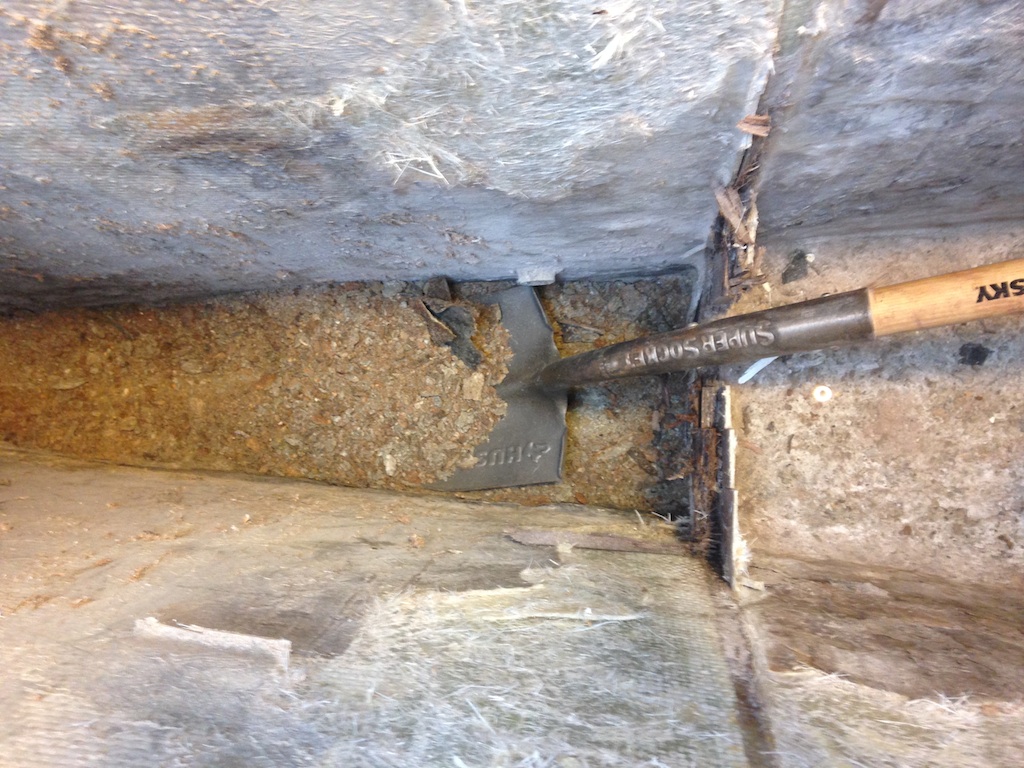
The damaged concrete broke up fairly easily.
The photo below was taken after all of the damaged concrete had been removed from steps 6 and 7, and we can see part of the bottom of the keel, where there was once about 6 inches of conctete. The new bulkhead will be installed in two pieces. The bottom piece will extend just above step 6. In this way, step 7 will be accessible for a proper repair, after which the top piece of the bulkhead will be installed.
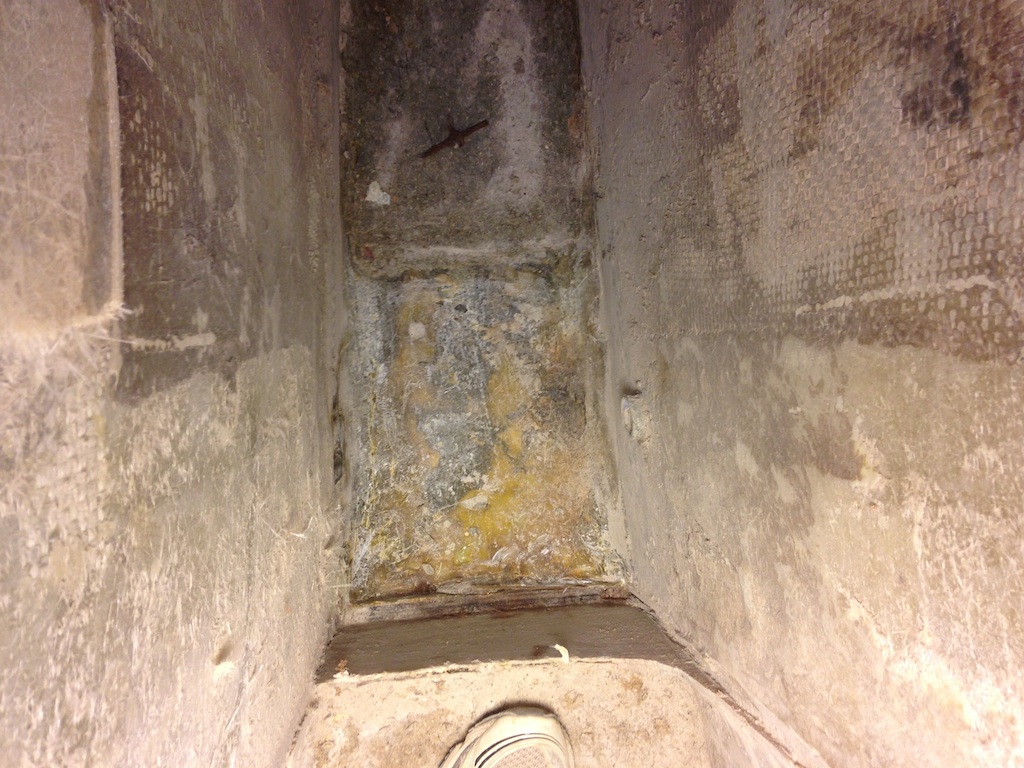
Standing on step 6 and looking down at step 7.
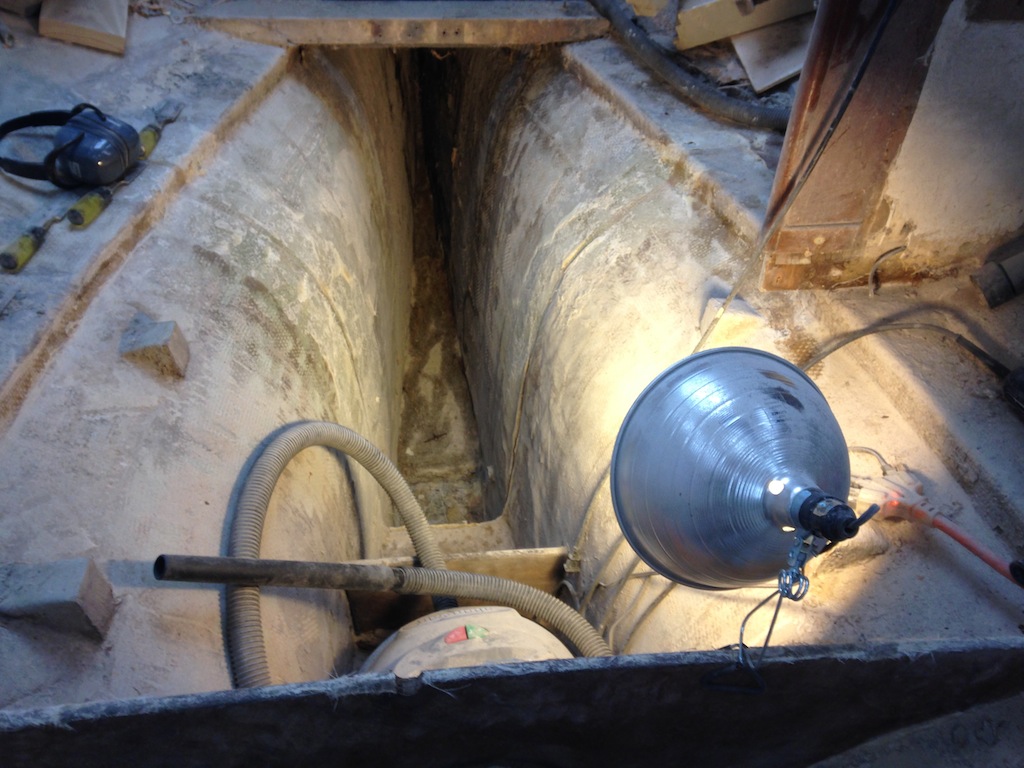
Looking back into the bilge.